On this page
Check under-sink plumbing for leaks by emptying the cabinet, wiping every joint dry, then running the sink through each of its functions (hot, cold, a full drain, the sprayer, the disposal, and a dishwasher drain cycle) while you feel each joint with a dry paper towel. Look for dampness, crust, stains, and a musty smell. The whole house takes a few minutes per sink once a month, and most leaks found are a loose slip nut or a tired supply line.
Why does an under-sink leak matter?
An under-sink leak matters because it is slow and hidden. A drip from a supply fitting or a weeping trap soaks the cabinet floor, swells the particleboard, and feeds mold behind the cabinet before anything shows on the kitchen floor. By the time the smell reaches you, the cabinet base is ruined. The same leak found on the monthly check is a towel and a quarter turn of a nut, which is why where water damage starts is so often here.
In new construction, the joints that leak first are the ones tightened by hand on install day: the trap slip nuts and the supply nuts at the stops. They settle over the first months, and a weep appears where there was none at the walkthrough.
Where do under-sink leaks start?
Under-sink leaks start at joints, and each joint fails in its own way. The stops weep at the stem and show crust; the flexible supply lines let go at the crimped ends, and rubber ones bulge. The faucet leaks down through its base and along the sprayer hose, but only when the sprayer runs. The P-trap weeps at the slip nuts, only while the sink drains. The disposal leaks at the sink flange, the dishwasher inlet, or, when the housing has rusted through, from the bottom seam. Check each in turn, because they look alike and fail differently.
What do you need?
You need a flashlight, paper towels, a dry cloth, and about ten minutes for the first sink. Keep pliers and an adjustable wrench nearby for a nut that needs a small turn; nothing is disassembled on a routine check.
- A flashlight or headlamp
- Paper towels; dry paper shows damp better than a hand
- Pliers and an adjustable wrench
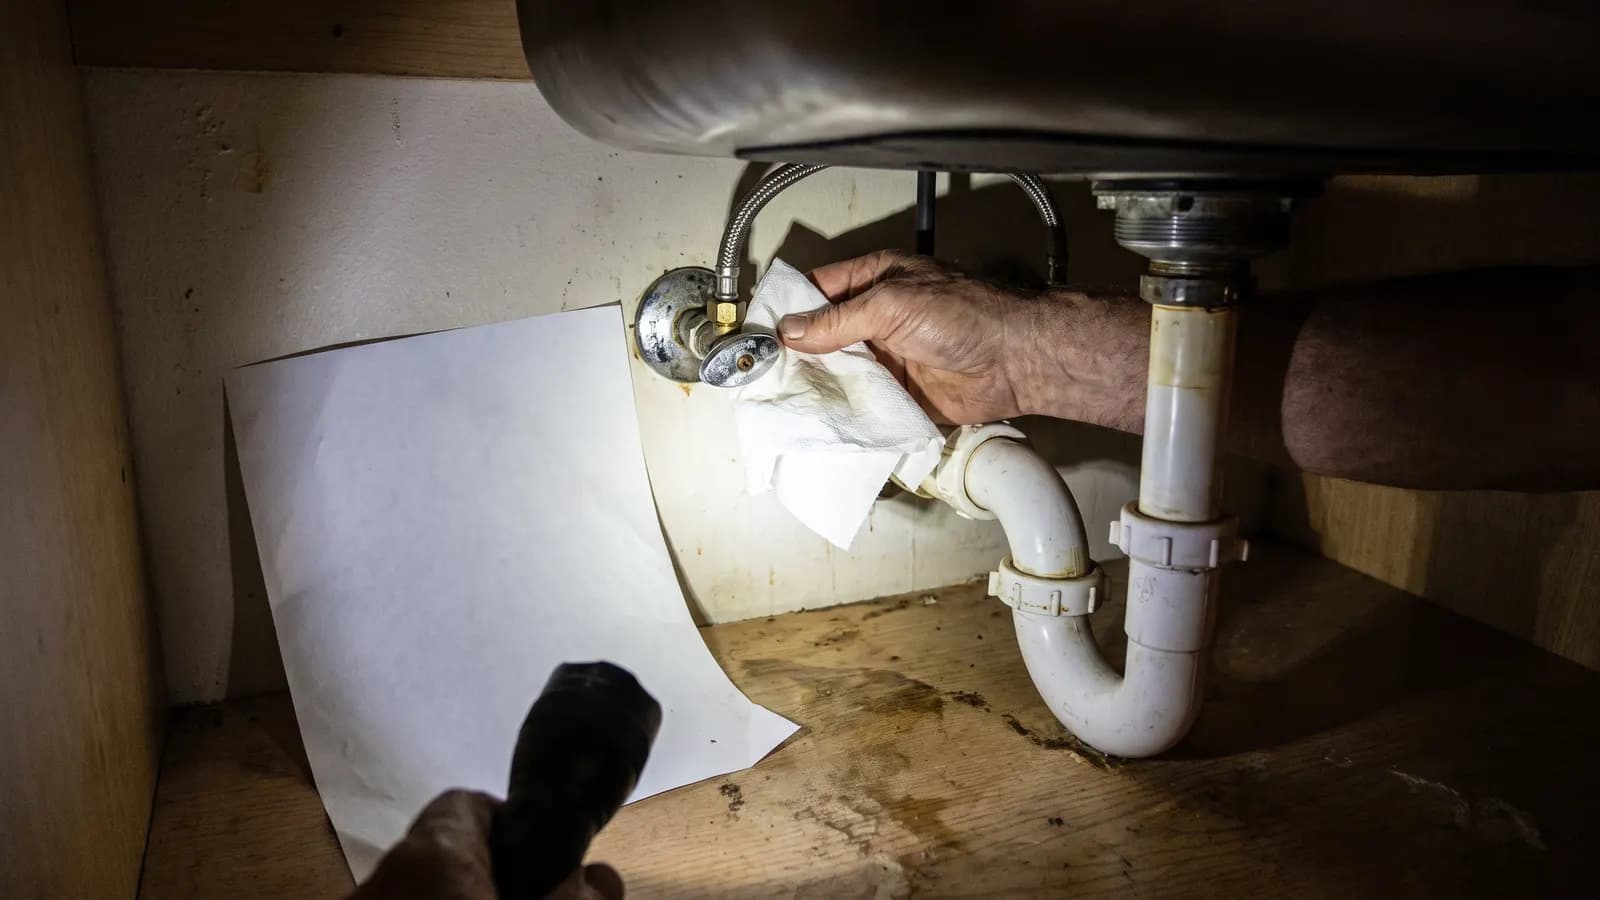
- A sheet of white paper for the cabinet floor, as a drip detector between checks
What are the steps?
Empty the cabinet, wipe every joint dry, then run each sink function for a minute and feel each joint with a paper towel while it runs. Tighten what is loose by hand, replace what is worn, and leave a dry sheet of paper on the cabinet floor to catch anything you missed.
- Empty the cabinet and look at the floor of it. Stains, swelling, or a musty smell mean a leak has already happened. Done when: the cabinet floor is bare and lit.
- Wipe every joint dry: stops, supply lines, faucet base, sprayer hose, trap nuts, disposal, and the dishwasher hose clamp.
- Run the cold tap at full for a minute and feel each supply joint with a paper towel. Then run the hot tap and repeat. Done when: every supply joint tests dry.
- Fill the sink halfway, pull the stopper, and feel the trap nuts and the tailpiece while it drains; slip nuts weep only under a full flow. Done when: the drain side tests dry.
- Run the sprayer for a minute and feel along the hose and at the faucet base.
- Run the disposal with water flowing and feel the top flange and the bottom of the housing. Water from the bottom seam means a disposal replacement, not a repair. Then run a dishwasher drain cycle and feel the drain hose clamp.
- Look at both stops without turning them; crust on the stem means the packing is weeping. Do not operate an old stop unless you know where the main shutoff is; a stem that has not moved in years can start dripping when it does.
- Tighten what is loose. A slip nut gets a quarter turn by hand; a compression nut gets a small turn with the wrench while pliers hold the valve still. Done when: the joint is dry after another minute of flow.
- Lay a clean sheet of white paper on the cabinet floor under the products and check it at the next monthly pass. A ring on the paper shows a leak the towel test missed.
When should you stop and call a pro?
Stop and call a plumber when a stop weeps at the stem and tightening its packing nut does not stop it, when a supply line drips and the stop will not close to let you replace it, when the faucet leaks from its body rather than a connection, or when the drain leaks behind the wall at the trap arm. A stained cabinet floor with a wet subfloor beneath it is also past the DIY line; the floor needs to be opened and dried.
What should you record?
Record each sink checked, what you found, and what you tightened or replaced, with the date. Note the type of supply lines when you first see them. The monthly check goes on the maintenance schedule as one task covering every sink; in Property Station the completion notes on that task become the leak history the home record carries to the next owner. A stain with no source is the cue for the water meter test.
Common questions
The cabinet floor is stained but everything is dry now. What happened?
An old leak that has stopped, or an intermittent one. Sprayer hoses and the dishwasher connection can drip only when that part is in use. Dry the area, lay down a paper towel, run every function of the sink, and check again the next day.
Can I tighten a dripping slip nut myself?
Yes. Slip nuts on the P-trap and tailpiece are hand-tight, and a quarter turn by hand often stops a weep. If it does not, take the joint apart, check that the washer is seated the right way, and reassemble. Do not put a wrench on a plastic nut; it cracks.
Should I replace the supply lines?
Replace any supply line that is corroded, kinked, bulging, or older than you can account for, and any that is plain rubber rather than braided stainless. They are inexpensive and they are the part that fails without warning. Turn the stops off first.
What should you do next?
Do the kitchen sink first. While the cabinet is empty, clean the faucet aerator and the dishwasher filter, and look at the bead of caulk where the sink meets the counter and the tub meets the tile, because a failed caulk line sends water into the same cabinet from above.