On this page
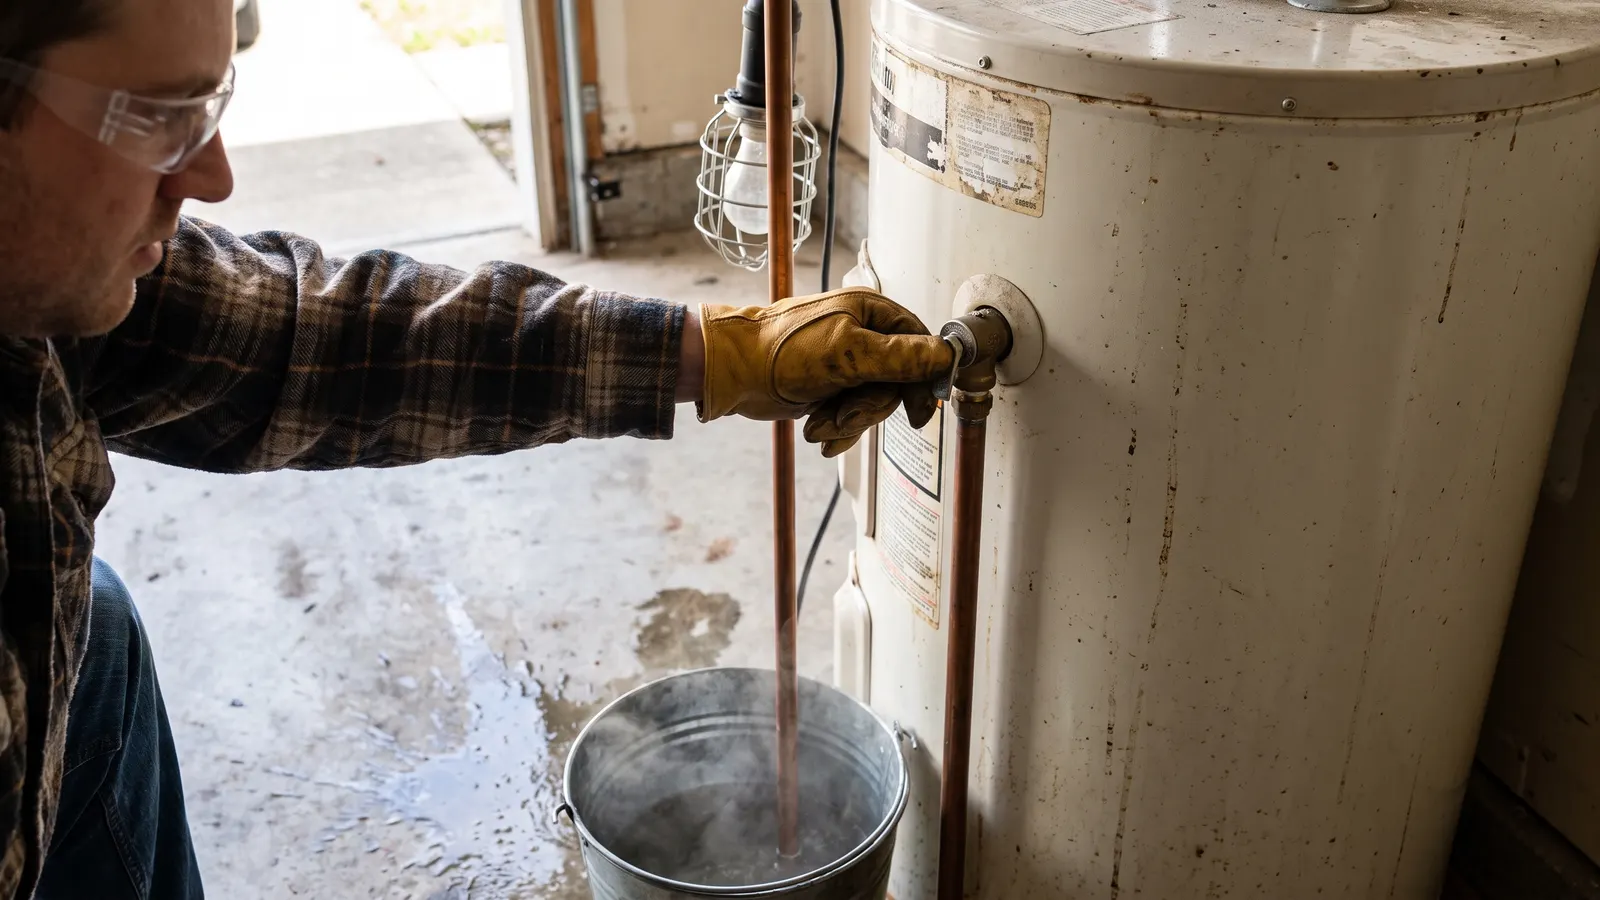
Test the temperature and pressure relief valve on a tank water heater once a year: put a bucket under the discharge pipe, lift the valve's lever for a few seconds so hot water flushes through, and let it snap closed. If the valve does not open, or keeps dripping afterward, it needs replacing, and the heater should not run under pressure until it is. Manufacturers describe this test in most owner's manuals; the manual for your heater is the authority on the exact procedure.
The TPR (temperature and pressure relief) valve is the brass valve near the top of the tank with a small lever and a pipe running down its side. If the tank overheats or over-pressurizes because a thermostat or a pressure regulator fails, the valve opens and dumps water and pressure before the tank can rupture. A valve that has scaled shut cannot do that.
Why does the relief valve need a test?
The relief valve needs a test because it does nothing for years, mineral scale can seal its seat, and a seized valve turns a failed thermostat into a dangerous tank. Lifting the lever once a year confirms the valve opens, flushes the seat, and shows whether the discharge pipe is clear. It is a safety check, not a performance one, and it takes a few minutes.
Do the test on a day you could reach a plumber. A valve that has never been exercised sometimes will not reseat, and the fix is a new valve, not a bucket under the old one. Plan for that outcome, and the test is low-risk; skip the test, and the outcome you are planning for is worse.
What do you need?
A bucket, a towel, gloves, and eye protection: the water that comes out is as hot as the tank and it can splash. Know where the cold water shutoff on top of the heater is and how to turn off the heat source (the gas control or the breaker), in case the valve will not close. A flashlight helps you see the valve and the discharge pipe.
- A bucket and an old towel
- Gloves and eye protection
- A flashlight
- The location of the cold inlet valve and the gas control or breaker
What are the steps?
Look at the valve and the discharge pipe, put the bucket under the pipe's end, lift the lever for a few seconds and watch hot water flow, release the lever and let it snap shut, confirm the flow stops within a minute, and check again an hour later for drips. If the valve will not open or will not close, stop the heat source and call a plumber.
- Find the valve near the top of the tank and follow its discharge pipe to the end. The pipe should run downhill with no cap and end near the floor or a drain. Done when: you know where the water will come out.
- Put the bucket under the pipe's end, or make sure the drain is clear.
- Put on the gloves and eye protection. Stand to the side, not over the pipe.
- Lift the lever fully and hold it for a few seconds. Hot water should flow strongly into the bucket. Done when: you see a clear, strong flow.
- Release the lever and let it snap closed on its own. Do not ease it down; the snap seats the valve.
- Watch the pipe. A brief trickle is normal as the pipe drains; flow that continues after a minute means the valve has not reseated. Lift and snap it once more.
- If it still drips, or if the lever would not move, or if nothing came out when it did: turn the gas control to the off or pilot setting (or switch off the electric heater's breaker) and close the cold inlet valve, then call a plumber. Do not cap the pipe.
- Check the pipe end again an hour later and the next day. Done when: it is dry.
When should you stop and call a pro?
Call a plumber if the valve does not open, does not close, drips after a second try, or has no discharge pipe or a pipe that is capped, threaded at the end, reduced in size, or running uphill; if the valve has been discharging on its own (a puddle under the pipe, or the sound of it opening), which means the tank's thermostat or the house's water pressure needs attention, not the valve; or if you see corrosion or scale around the valve body.
Replacing the valve means draining part of the tank and threading a new valve into it; it is quick for a plumber and easy to get wrong.
Never remove, plug, or cap a relief valve or its pipe, for any reason, and never install a smaller valve than the tank's label calls for.
What should you record?
Record the test date and result, and the valve's replacement date if it was replaced. A valve that drips a little more each year, or a heater whose valve has discharged on its own, are patterns worth seeing. Do the test on the same day as the yearly tank flush and set both as recurring tasks; the heat source is already off and the bucket is already out.
Common questions
The valve keeps dripping after the test. Did I break it?
Probably not; a valve that has never been lifted often has scale on its seat, and the test dislodged it. Lift the lever again briefly to flush it. If it still drips after a second try, the valve needs replacing, which is a plumber's job the same week. Never plug or cap a dripping relief valve.
What if nothing comes out when I lift the lever?
The valve is stuck or the discharge pipe is blocked, and the tank has no working relief. Stop, do not force it, and call a plumber to replace the valve. A heater with a seized relief valve is not safe to keep running under pressure.
Where should the discharge pipe end?
It should run down from the valve, with no upward runs, no threads or cap on the end, and end a few inches above the floor or a drain, or outdoors where discharge will not hurt anyone. A pipe that ends in a bucket, is capped, or runs uphill is a defect a plumber should correct.
What should you do next?
Pair the test with the flush each fall. While the utility room is your focus, the freeze-protection walk covers the pipes around the heater that are exposed to cold, and it is the same season.