On this page
Inspect siding once a year by walking every wall slowly, close up and then from across the yard, looking for four things: gaps where the siding meets trim, windows, or doors; pieces that are loose, cracked, or missing; wood that is soft when pressed; and stains, streaks, or peeling paint below a joint that show water has been getting in. Then check the ground line for siding buried in soil or mulch. Most of the damage that costs money on a wall starts at a joint, not in the middle of a panel.
Why does siding need a yearly look?
Siding needs a yearly look because it is a rain screen, not a seal. Behind it is a water-resistive barrier and flashing that carry water back out, and the siding's job is to shed most of the rain and protect that layer from sun and impact. When a piece loosens, a joint opens, or flashing is missing, water reaches the sheathing and stays there, and by the time the wall shows a stain inside, the framing has been wet for seasons. The walk finds the small openings while they are still a tube of caulk or one replaced board.
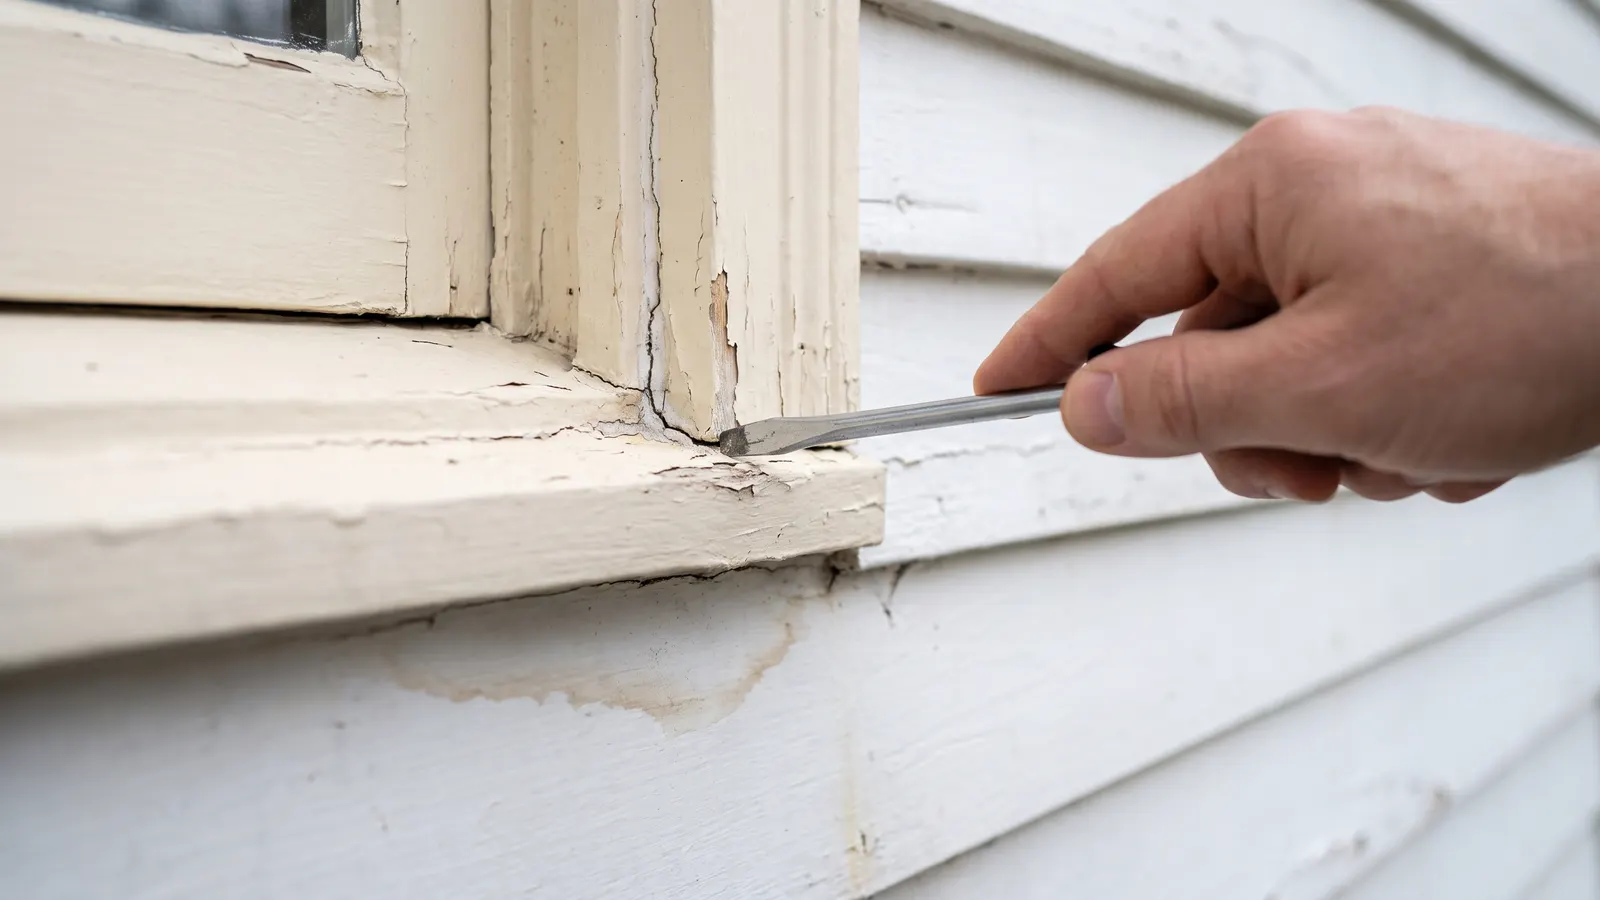
The Building America Solution Center's guide to storm windows makes the point that matters for the whole wall: peeling paint, cracks, or rotten wood at the sills or window trim is often a sign of water intrusion somewhere above or around the window. The damage shows below; the opening is above.
What does each siding type fail at?
Each siding material has its own failure pattern, and knowing yours tells you where to look. Vinyl comes loose and cracks; fiber cement cracks at the ends and opens at butt joints; wood rots at the bottom edges and where two pieces meet; brick veneer sheds its mortar and blocks its weep holes; stucco cracks and stains where water sits behind it. The joints, corners, and the bottom course are the common ground for all of them.
| Siding | Look for | Usually means |
|---|---|---|
| Vinyl | Unlocked or wavy panels, cracks, melted spots, pieces missing after wind | Loose fastening, reflected heat, or storm damage |
| Fiber cement | Cracked or chipped board ends, open butt joints, bare edges, paint failure at the bottom edge | Movement, missing joint flashing, or wicking from the ground |
| Wood | Soft spots, cupped or split boards, peeling paint, dark staining at joints | Water entering at joints or end grain |
| Brick veneer | Cracked or missing mortar, white powder (efflorescence), blocked weep holes, stair-step cracks | Water in the wall, or movement below |
| Stucco | Cracks, bulges, dark stains below windows, a hollow sound when tapped | Water trapped behind the stucco |
What do you need?
Nothing more than your eyes, a flashlight, a screwdriver for probing wood and mortar, binoculars for the upper walls and gables, a camera, and the photos from last year. A ladder is optional and most of the walk is done without one. If you use one, set it the way the Consumer Product Safety Commission's ladder rules describe: firm, level ground, a helper at the bottom, and never a metal ladder near power lines.
- Flashlight and a screwdriver or awl
- Binoculars for gables, upper walls, and the eaves
- Camera, with last year's photos to compare
- A tube of exterior caulk and a gun for anything small you find
- A ladder with a helper, only for what you cannot see from the ground
What are the steps?
Start on the wall that takes the weather, walk each wall close up looking at every joint and then from a distance looking for waves and stains, probe the bottom course and around every window, check the penetrations and the ground line, and finish with the eaves through binoculars. Photograph anything you are unsure about from the same spot as last year.
- Start with the sunny, wind-facing wall; it fails first. Walk it close enough to touch, following every horizontal and vertical joint with your eyes.
- Press the bottom course and the bottom of every trim board with the screwdriver. Done when: nothing gives.
- At each window and door, check the head flashing, the caulk at the sides, and the trim below. Look for staining or peeling on the wall under the sill.
- At every penetration (hose bibs, vents, lights, cables, the AC lines), check that the caulk is intact and the flashing or block is tight to the wall.
- Check the corners and the bottom edge. Siding should stop above soil, mulch, and hard surfaces with a visible gap; note anything buried.
- Step back across the yard and look at the wall as a whole for waves, sags, color changes, and streaks under joints.
- Use the binoculars on the gables, the eaves, and the soffits. Bubbled paint, dark staining, or sagging soffit panels at the eaves point to a gutter or roof problem above.
- Tap stucco and brick where they look stained; a hollow sound or crumbling mortar goes on the list.
- Caulk any small open joint the manufacturer allows, using the same rules as the fall caulk walk. Done when: every opening you found is either sealed or on the list.
- Photograph each wall from the same corners as last year and note what changed.
When should you stop and call a pro?
Call a siding contractor or a carpenter when the screwdriver sinks into wood or sheathing, when a stain inside the house lines up with a joint outside, when stucco sounds hollow or bulges, when brick shows stair-step cracks or a wall section that has moved, or when a fix needs the siding removed to reach the flashing behind it. Those are diagnosis jobs; caulk over them hides the problem for a season.
On a new-construction home, loose vinyl, open butt joints on fiber cement, missing flashing at a window, and siding buried by the final grading are workmanship items. Photograph them and report them to the builder in writing during the warranty period; check your warranty document for the wording.
What should you record?
Record the date, a photo of each wall from a fixed spot, what you found and what you did about it, and the siding type, brand, and color if you know them. Over a few years the photo set shows what is moving and what is stable, which is the evidence a warranty claim or a sale needs. Put the walk on the same recurring spring task as the paint check, and keep the siding product and color on the Paint & Finishes page so a repair matches.
Common questions
What is the gap at the bottom of my siding for?
Drainage. The bottom edge of vinyl, the weep holes in a brick wall, and the gap above a window head flashing are all designed to let water that gets behind the siding back out. Do not caulk them, paint over them, or bury them in mulch or soil; a wall that cannot drain rots from the inside.
Is a wavy vinyl wall a problem?
Usually it is cosmetic, caused by panels nailed too tight to move with temperature or by heat reflected off a nearby window. It becomes a problem when panels unlock from each other or pull loose at the ends, because wind then gets under them. On a new-construction home, waviness in the first year is a workmanship item to report.
Should I caulk the siding joints?
Only the joints the manufacturer says to caulk, which are usually where siding meets trim, corners, and penetrations such as pipes and light fixtures. Many lap joints and butt joints are designed to drain and should stay open. Never caulk a bottom edge, a weep hole, or the gap under a window's head flashing.
What should you do next?
Walk the weather wall this week and photograph it. Then do the two jobs the walk usually turns up: touch up the paint where the wood has gone bare, and cut back the shrubs and branches that keep a wall damp. If the eaves showed staining, the cause is above, and the yearly roof check is the next walk; if the bottom course is buried, the foundation check is.