On this page
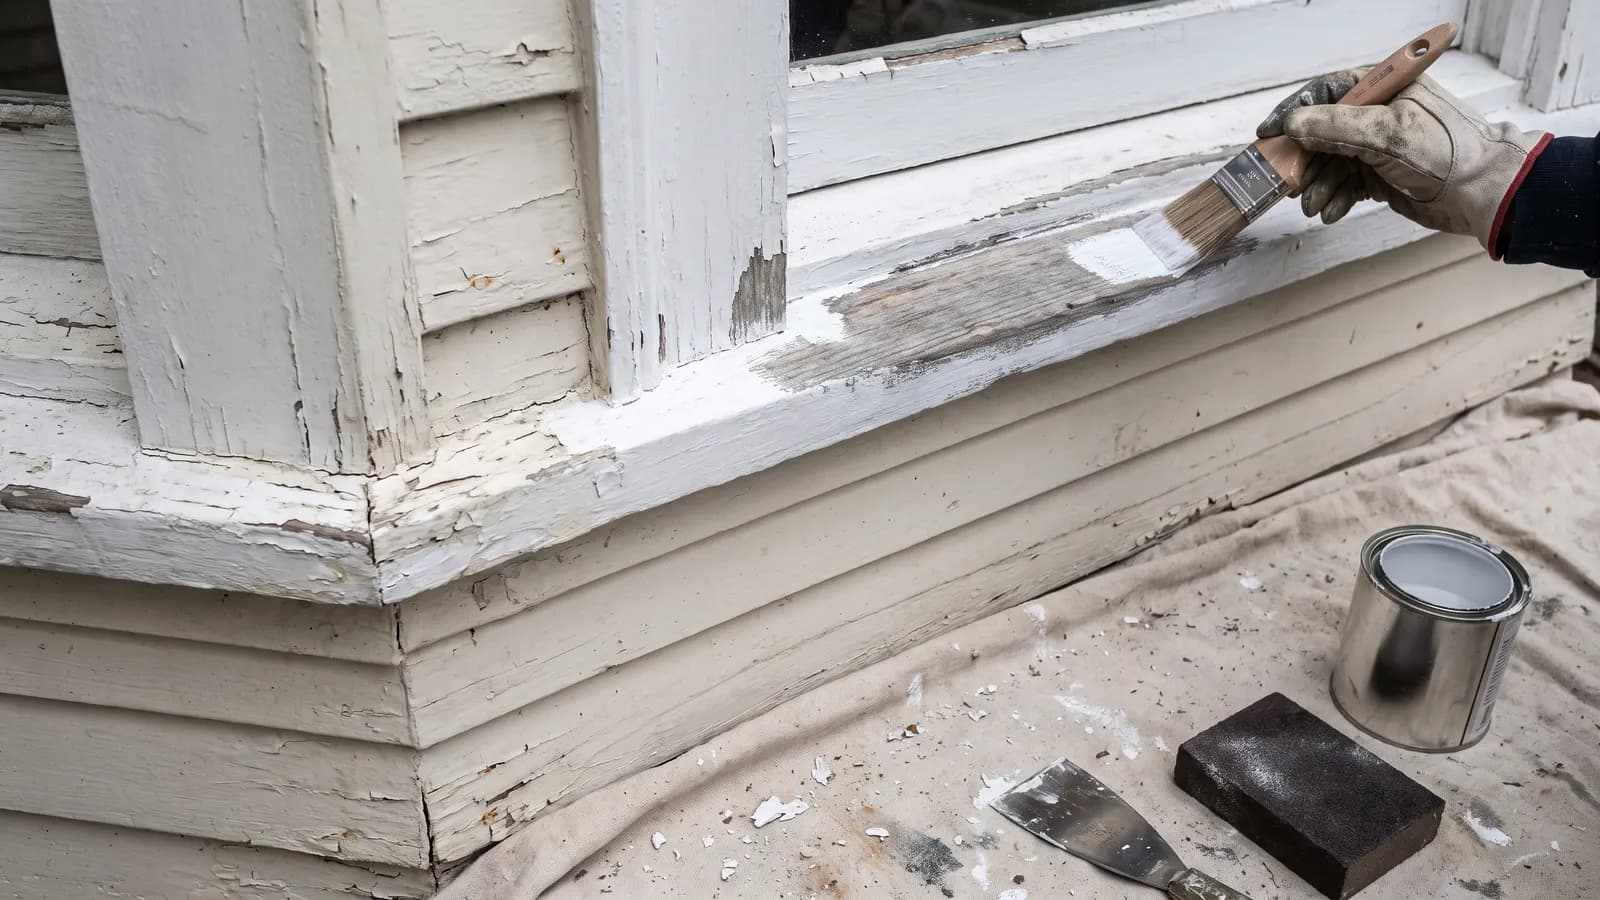
Touch up exterior paint by scraping the loose and peeling paint back to a sound edge, sanding that edge smooth, priming any bare wood, caulking the open joint that let water in, and painting the area to a natural break with the same product and sheen. Do it as soon as you see the paint lift, because the paint is the wood's only protection from water, and a bare patch rots long before it looks bad. If the house was built before 1978, read the lead section before you sand anything.
Why does a small paint failure matter?
Peeling paint matters because the paint is the weather barrier on the wood, and the failure is a symptom. Paint lifts where water got behind it: an open joint at a window casing, a split in a trim board, a gap where the caulk pulled away, a sprinkler that hits the wall each morning. Fix the paint alone and it peels again; fix the water and the paint holds. The spots that go first are the sun-facing wall, window sills, the bottoms of trim boards and doors, and anywhere two pieces of wood meet.
In most houses we see, the first paint failure is on the sunny wall at the window sills and the bottom ends of the corner boards, and the cause is a joint that was never caulked or a sill that holds water. Look at what is behind the peel before you buy the paint.
How often should you touch up paint?
Walk the house once a year, in spring, and touch up whatever has lifted, cracked, or gone bare since the last walk; the annual siding inspection is the natural time. A full repaint comes when the touch-ups outnumber the sound areas or the color has faded past matching, and the interval depends on the product, the climate, and the exposure of each wall. New-construction owners should expect small touch-ups in year one as trim shrinks and joints open, and a builder's handoff package normally includes the paint colors for exactly that reason.
What do you need?
A paint scraper, medium and fine sandpaper or a sanding sponge, exterior wood filler for gouges, exterior caulk and a gun, exterior primer, the matching paint and sheen, a good brush, a drop cloth, eye protection and a dust mask, and a ladder set up safely if the spot is above reach. Pull the paint name and number from your record before you shop; the lid of the old can usually has the formula.
- Paint scraper and a putty knife
- Medium and fine sandpaper, or a sanding sponge
- Exterior wood filler and exterior paintable caulk with a gun
- Exterior primer, plus the matching paint in the same sheen
- A quality angled brush and a small roller for flat boards
- Drop cloth, painter's tape, eye protection, and a dust mask
- A ladder with a helper if the work is above head height
What are the steps?
Find and fix the water source, scrape to a sound edge, sand the edge smooth, fill gouges, prime bare wood, caulk the open joints, then paint to a natural break in thin coats. Work in shade and give each step its drying time. The order is the whole method: paint over a gap or a damp board fails again within the year.
- Look at why the paint failed. Find the open joint, the split, or the source of water and note it; the fix goes on this list too.
- Scrape the loose paint back until the scraper stops lifting anything. Done when: the edge of the remaining paint is stuck fast.
- Sand the edge so it feathers into the bare area, then scuff the surrounding sound paint so the new coat grips. Wipe off the dust.
- Probe the bare wood with the putty knife. Soft or spongy wood means stop; that is a carpentry job, not a paint job.
- Fill gouges and nail holes with exterior filler, let it dry, and sand flush.
- Prime the bare wood and filler, and let the primer dry for the time on the can. Done when: the primed area is uniformly dull with no bare grain showing.
- Caulk the open joints with exterior paintable caulk and tool it smooth, using the caulk rules for a house. Let it skin over before painting.
- Paint the area to a natural break: the whole trim board, the whole clapboard, or to a corner. Brush with the grain in a thin coat. Done when: there is no visible edge between old and new.
- Add a second thin coat after the first has dried, if the color or sheen still shows the patch.
- Clean the brush, seal the can, and write the date and the wall on the lid.
When should you stop and call a pro?
Stop and call a painter or a carpenter if the wood under the paint is soft, if the peeling covers whole walls rather than spots, if the failure is at a second-story sill or gable you cannot reach from a properly set ladder, or if the paint is blistering from moisture behind the wall rather than at a joint. Widespread peeling on a wall with no obvious water source can mean moisture from inside the house, and that is a diagnosis job before it is a paint job.
The EPA's lead pamphlet says homes built before 1978 are likely to contain lead-based paint, that paint in good condition is generally not a hazard, but that peeling, chipping, chalking, or cracking paint is a hazard and needs immediate attention. Its advice is not to remove lead-based paint yourself and to hire only Lead-Safe Certified firms for renovation, repair, or painting; open-flame burning and power sanding without a shroud and HEPA vacuum are prohibited methods.
The EPA's Renovation, Repair and Painting rule generally does not apply to a homeowner working on their own pre-1978 house, but it does apply if you rent out any part of it, and any contractor you pay must be certified. If your house is old enough, the safe touch-up is to have the paint tested first and to keep dust down with wet methods, or to hand the job to a certified firm.
What should you record?
Record the paint brand, color name and number, sheen, and where it went, plus a photo of the can label. Note the water source you found and fixed, because if the same spot peels again the record tells you the fix did not hold. A record of paint colors and finishes is the cheapest document a house has. Put the spring paint walk on a recurring schedule, and store the colors on the Paint & Finishes page so they are there at resale too.
Common questions
Why does my touch-up not match the wall?
The old paint has faded in the sun and the new paint has not, and a different sheen shows as a patch even when the color is right. Feather the sanded edge, use the same product and sheen, and paint the whole board or the whole trim piece to a natural break such as a corner or a joint. A patch in the middle of a board always shows.
Do I need to prime first?
Prime any bare wood, bare metal, filled spots, and anything chalky or glossy; paint alone does not stick to those. Sound old paint that has been scuffed with sandpaper usually does not need primer. Spot-prime just the bare areas and let it dry for the time on the can before the top coat.
What weather can I paint in?
The can gives a temperature range, and the surface matters more than the air; a wall in afternoon sun can be far hotter than the forecast. Paint in shade or after the sun has moved off the wall, stop early enough that the coat dries before evening dew, and check the forecast for rain inside the can's dry time.
What should you do next?
Find the paint can and write the color in the record today, before the next peel. Then do the walk: the window sills and trim get checked on the same afternoon as cleaning the windows, tracks, and screens, and the peel that shows up at a sill is usually the caulk joint above it.